Getting Started with Your Framer Template
You've just purchased a Framer template, and now you're staring at a beautiful design wondering where to begin. The good news? With the right approach, you'll have your customized site ready in hours, not days. This guide walks you through the essential first steps to set yourself up for success.
What Happens After You Purchase
Once you complete your purchase, you'll receive a link to duplicate the template directly into your Framer workspace. This isn't a download—it's a one-click duplication that brings the entire project, including all pages, components, and CMS collections, into your account.
Click the remix link, and Framer will create a complete copy that's entirely yours to edit. You'll see it appear in your project list within seconds, ready to customize without affecting the original template.
Understanding Your Template Structure
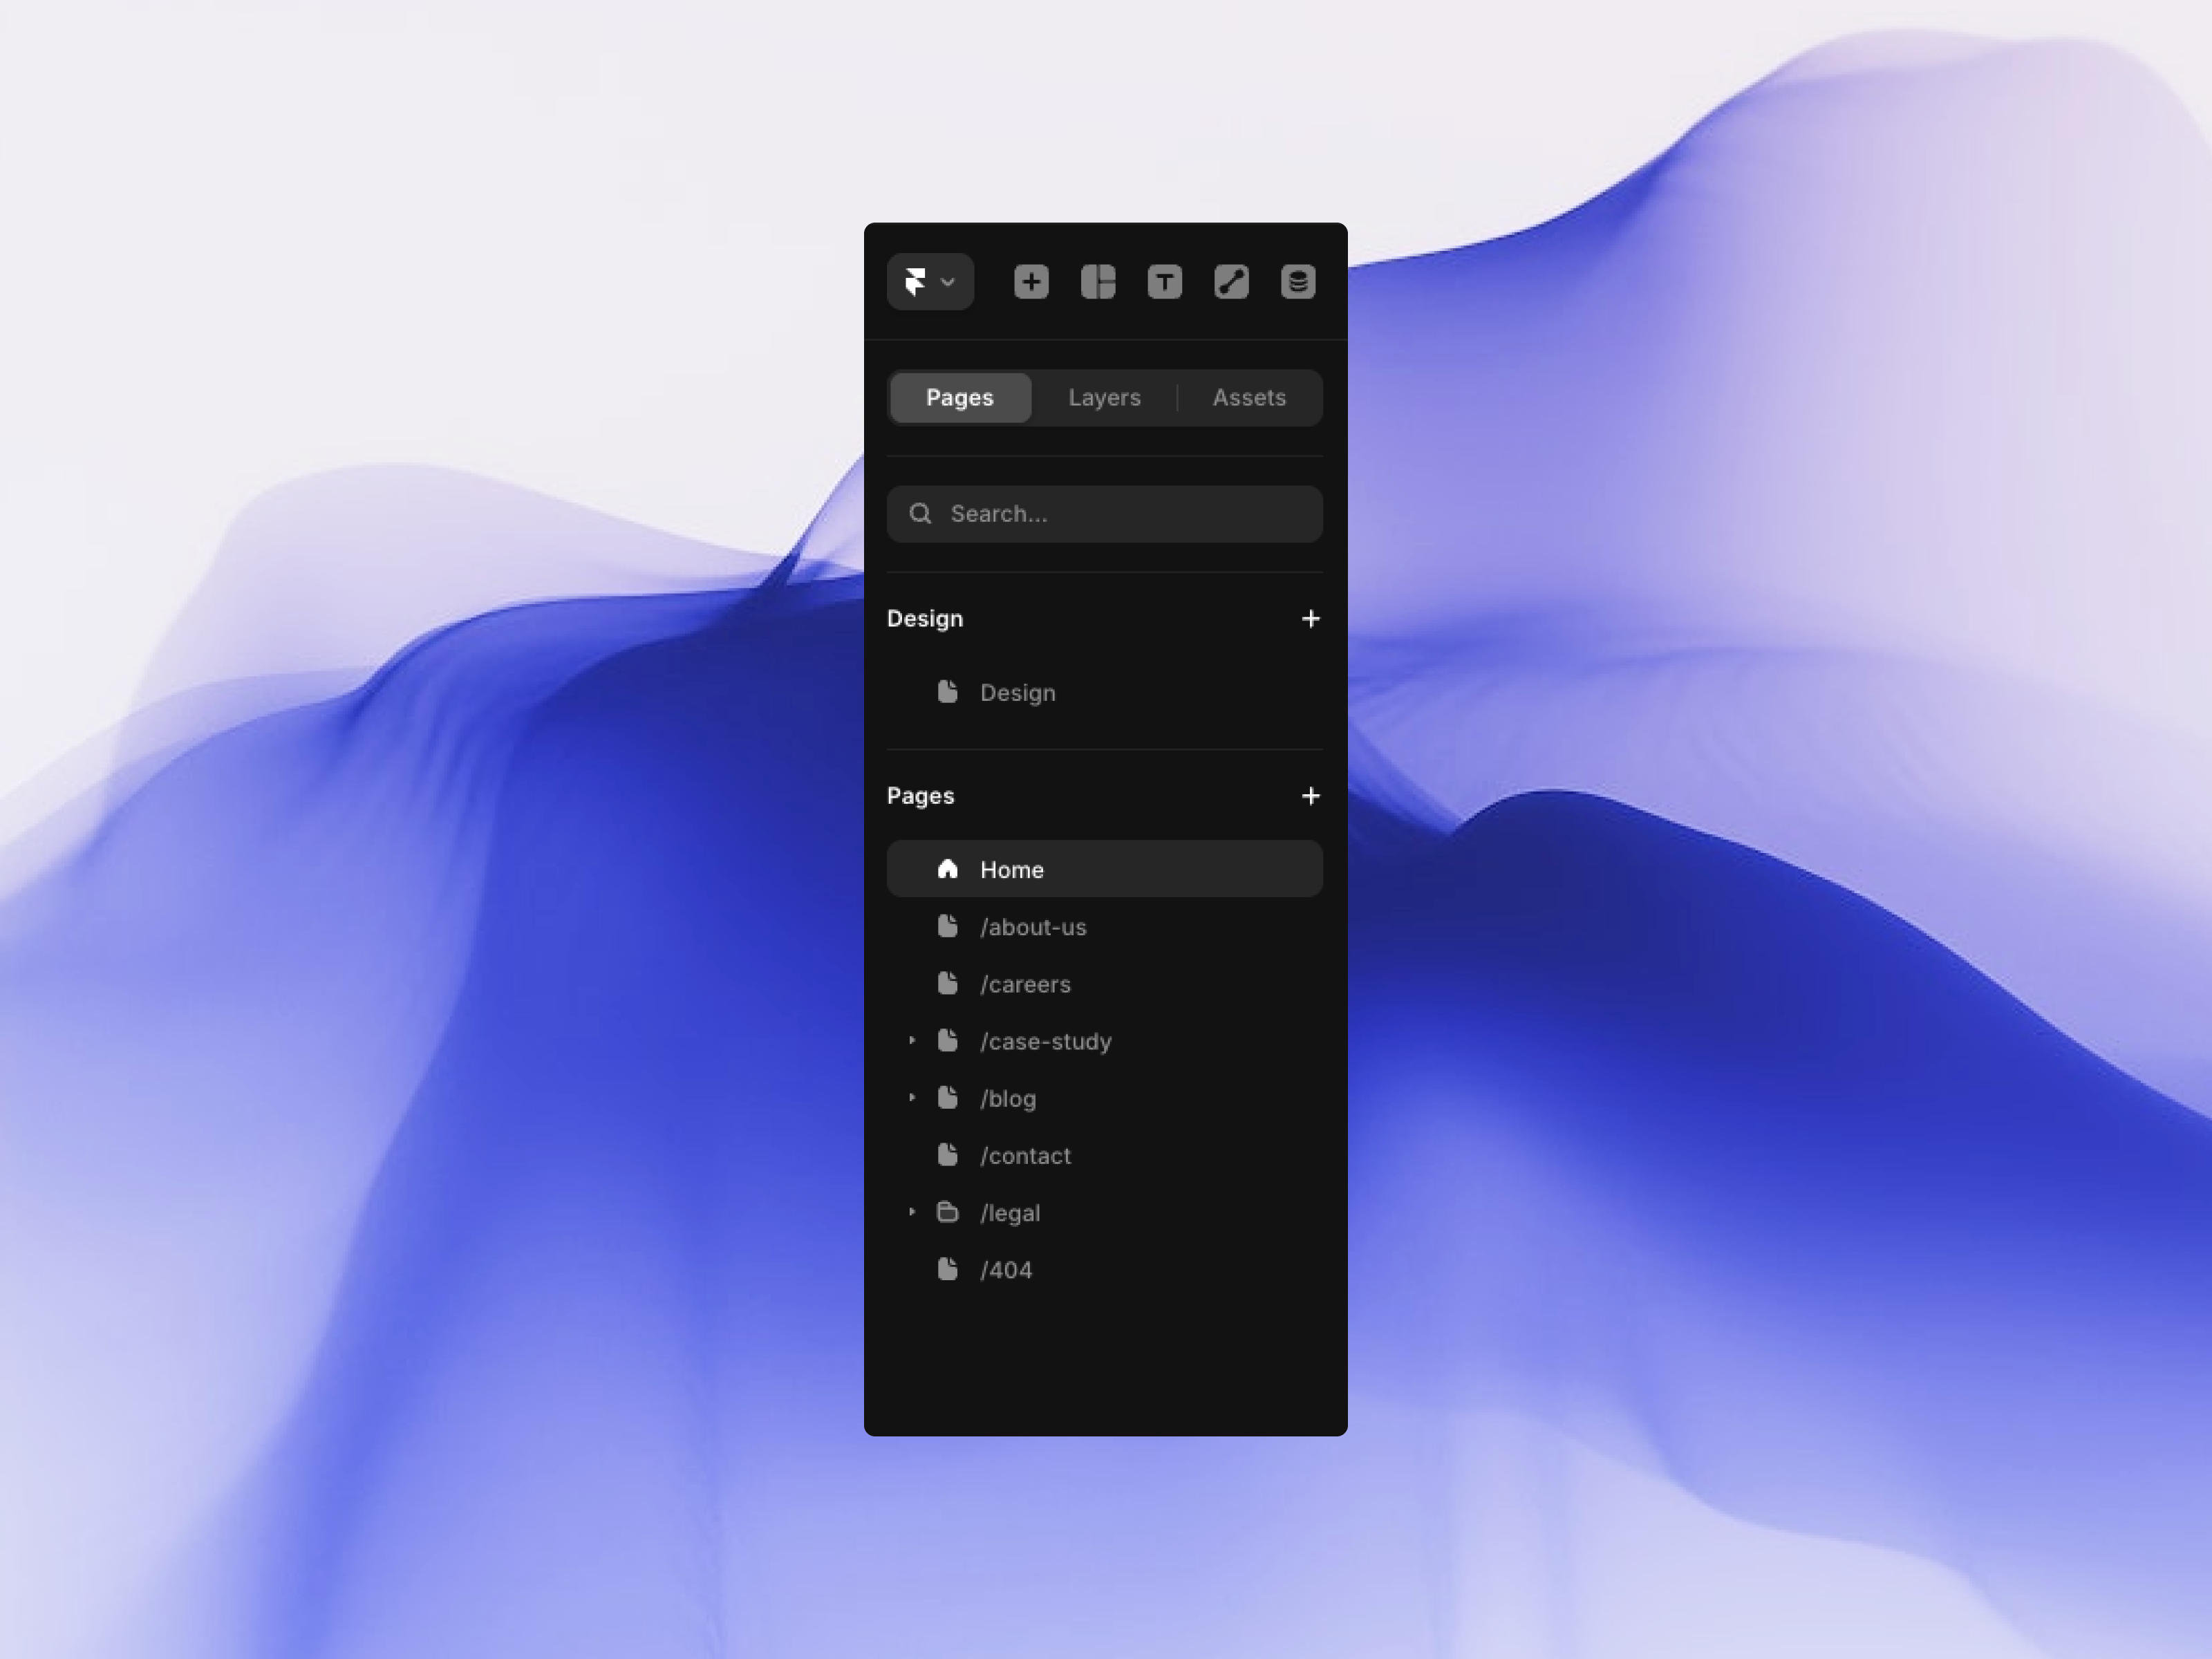
Before diving into edits, take a moment to explore what you're working with. Your template is organized into three key areas:
Pages are the foundation of your site. Open the Pages panel on the left, and you'll see your homepage, about page, services, contact form, and any additional pages included in your template. Each page is a separate canvas where your content lives.
Layers show you everything on the current page in a hierarchical view. Think of this as your x-ray vision into the design. Sections, components, text blocks, and images all appear here, making it easy to select exactly what you need to edit.
Assets store all the reusable elements used across your site, such as components, colors, fonts, and other media files. Instead of uploading the same image or file multiple times, Framer keeps everything organized in one place so you can reuse assets consistently across pages.
Why You Shouldn't Edit Randomly (Yet)
It's tempting to start clicking and changing things immediately, but resist that urge for just a few minutes. Random edits can break carefully crafted layouts, misalign responsive designs, or disconnect CMS bindings without you realizing it.
Instead, spend your first ten minutes exploring. Click through pages, expand layers, and preview CMS items. Notice how sections are named, how components repeat across pages, and how the design responds when you resize your browser.
This exploration phase isn't wasted time—it's an investment that prevents frustrating layout issues later.
What Comes Next
With your foundation set, you're ready to start customizing. The next steps involve swapping out text and images, populating your CMS collections, and adjusting colors to match your brand. Each of these tasks becomes significantly easier because you took time to understand the structure first.
Remember: great customization isn't about changing everything—it's about changing the right things in the right order. You now have the knowledge to do exactly that.
Quick Tip: Keep the original template link bookmarked. If you ever need to reference how something was originally built, you can duplicate it again into a separate project for comparison.