How to Customize Text and Images in Framer
Your template looks great, but it's time to make it yours. Customizing text and images is where your brand starts to shine through—and fortunately, it's one of the most straightforward tasks in Framer. This guide shows you how to swap content safely while keeping your layout intact.
Editing Text the Smart Way
Select any text element on your canvas by clicking it once. You'll see it highlighted with a blue border, and a blinking cursor will appear. Start typing to replace the content immediately—it's that simple.
For headlines and short text blocks, inline editing works perfectly. Click, type, done. The text will automatically wrap and adjust based on the text properties already set in the template.
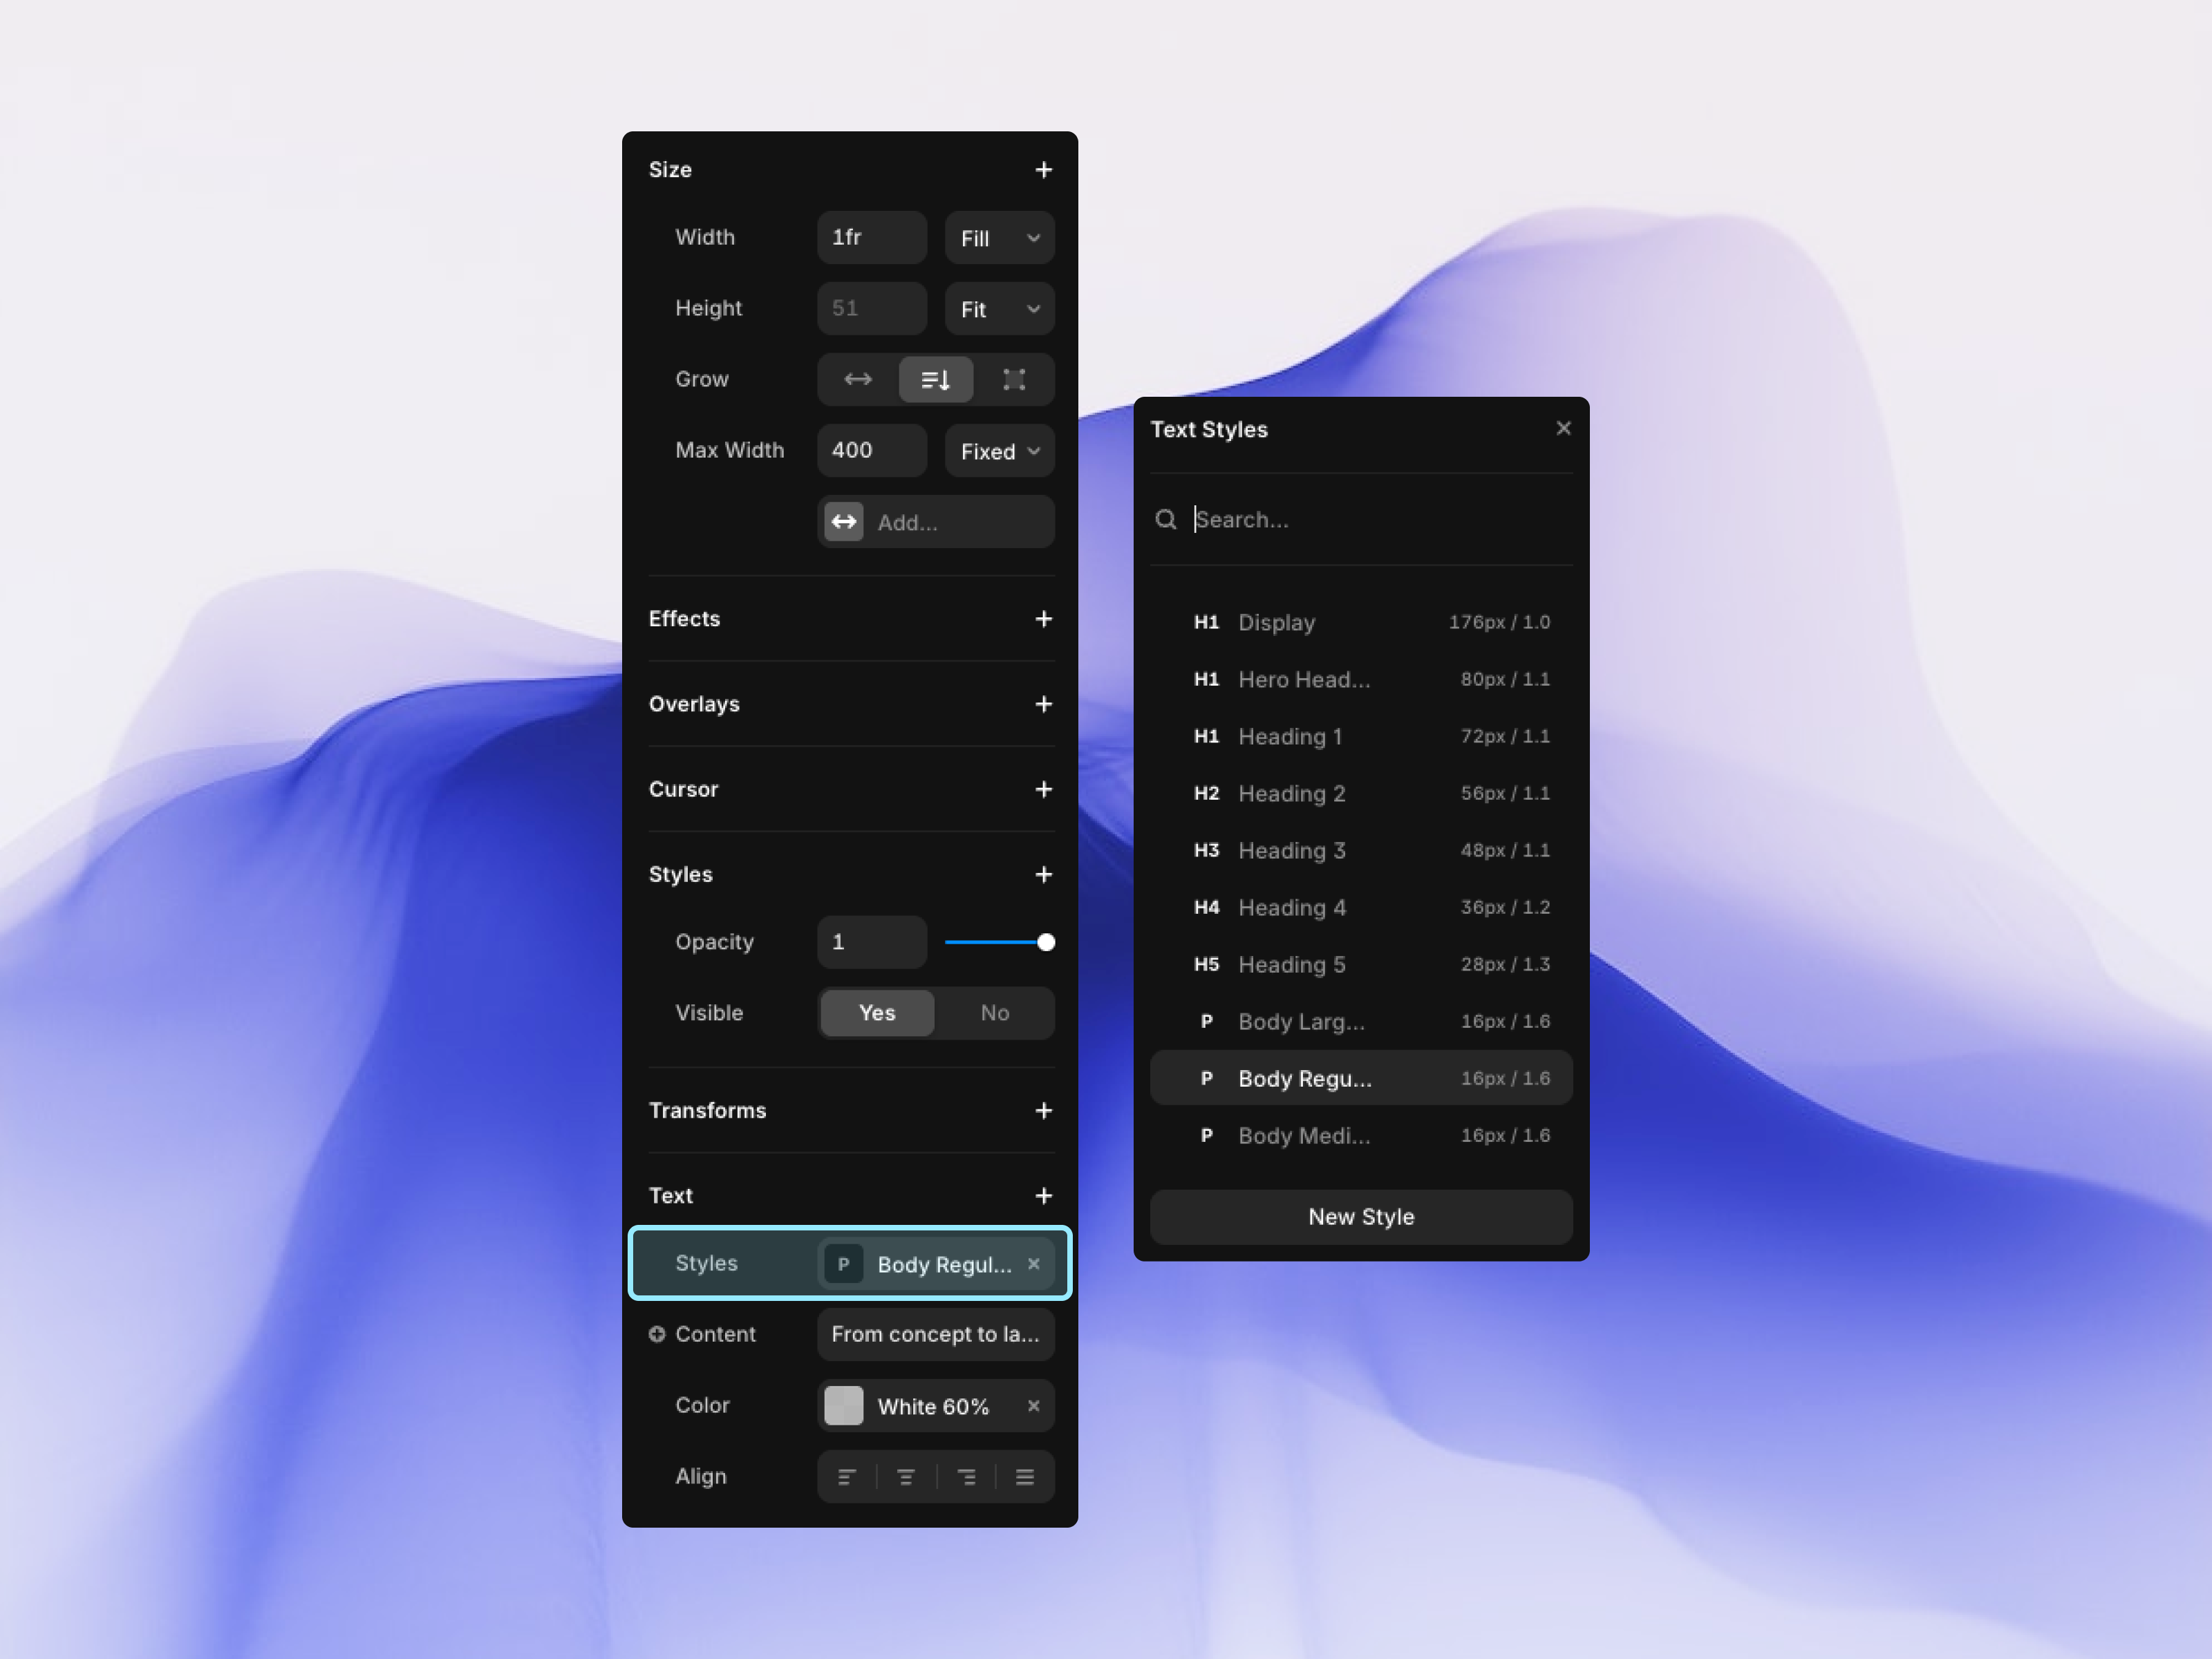
For longer paragraphs or body copy, you might want more control. With your text selected, look at the properties panel on the right. Here you can see the exact font family, size, weight, and line height that's been applied. Make changes here if needed, but resist the urge to override every setting.
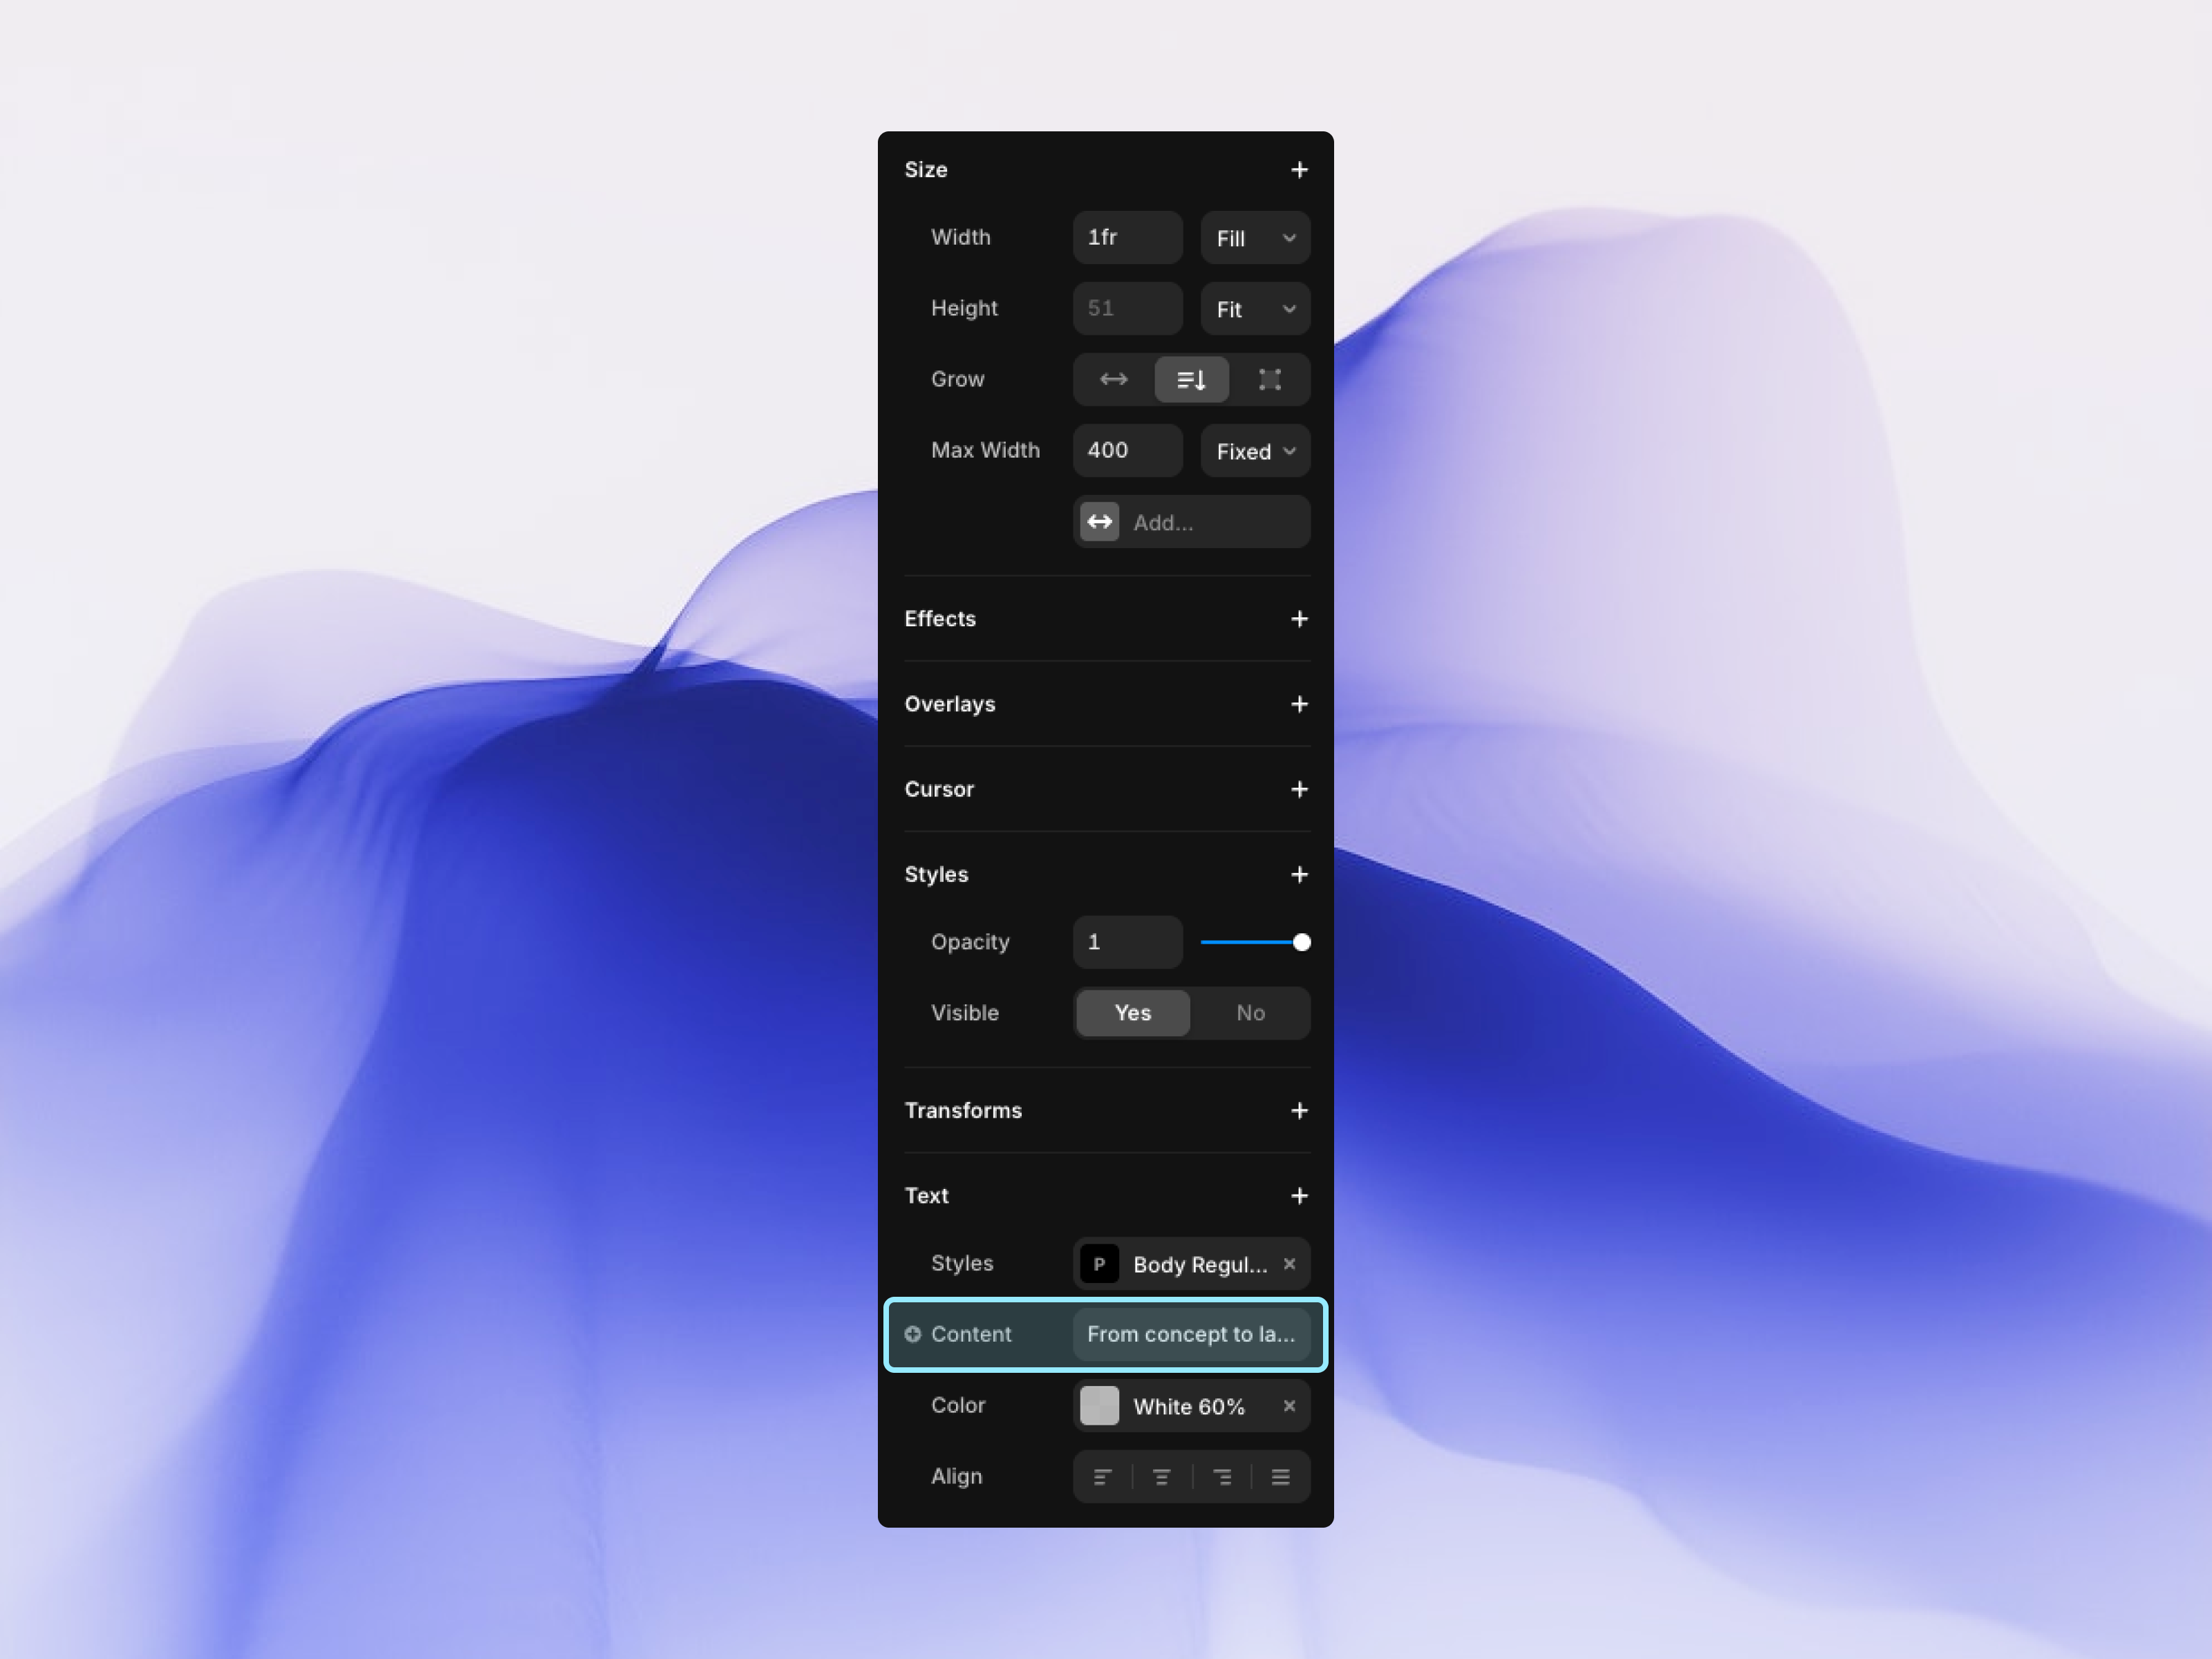
The Font Size Override Problem
Here's a common mistake: manually changing font sizes on individual text elements instead of using the template's existing text styles. When you override a font size, you break the connection to the global typography system, which means future updates won't apply to that element.
Instead of changing font size directly, check if there's a different text style that matches what you need. Click the style dropdown in the properties panel and choose from the preset options like Heading 2, Body Large, or Caption. These styles maintain consistency across your entire site and adjust properly at different breakpoints.
Replacing Images Without Breaking Layouts
Images are even easier than text. Select an image by clicking it on the canvas, then look for the image picker in the properties panel. You'll see a thumbnail of the current image with a replace button next to it.
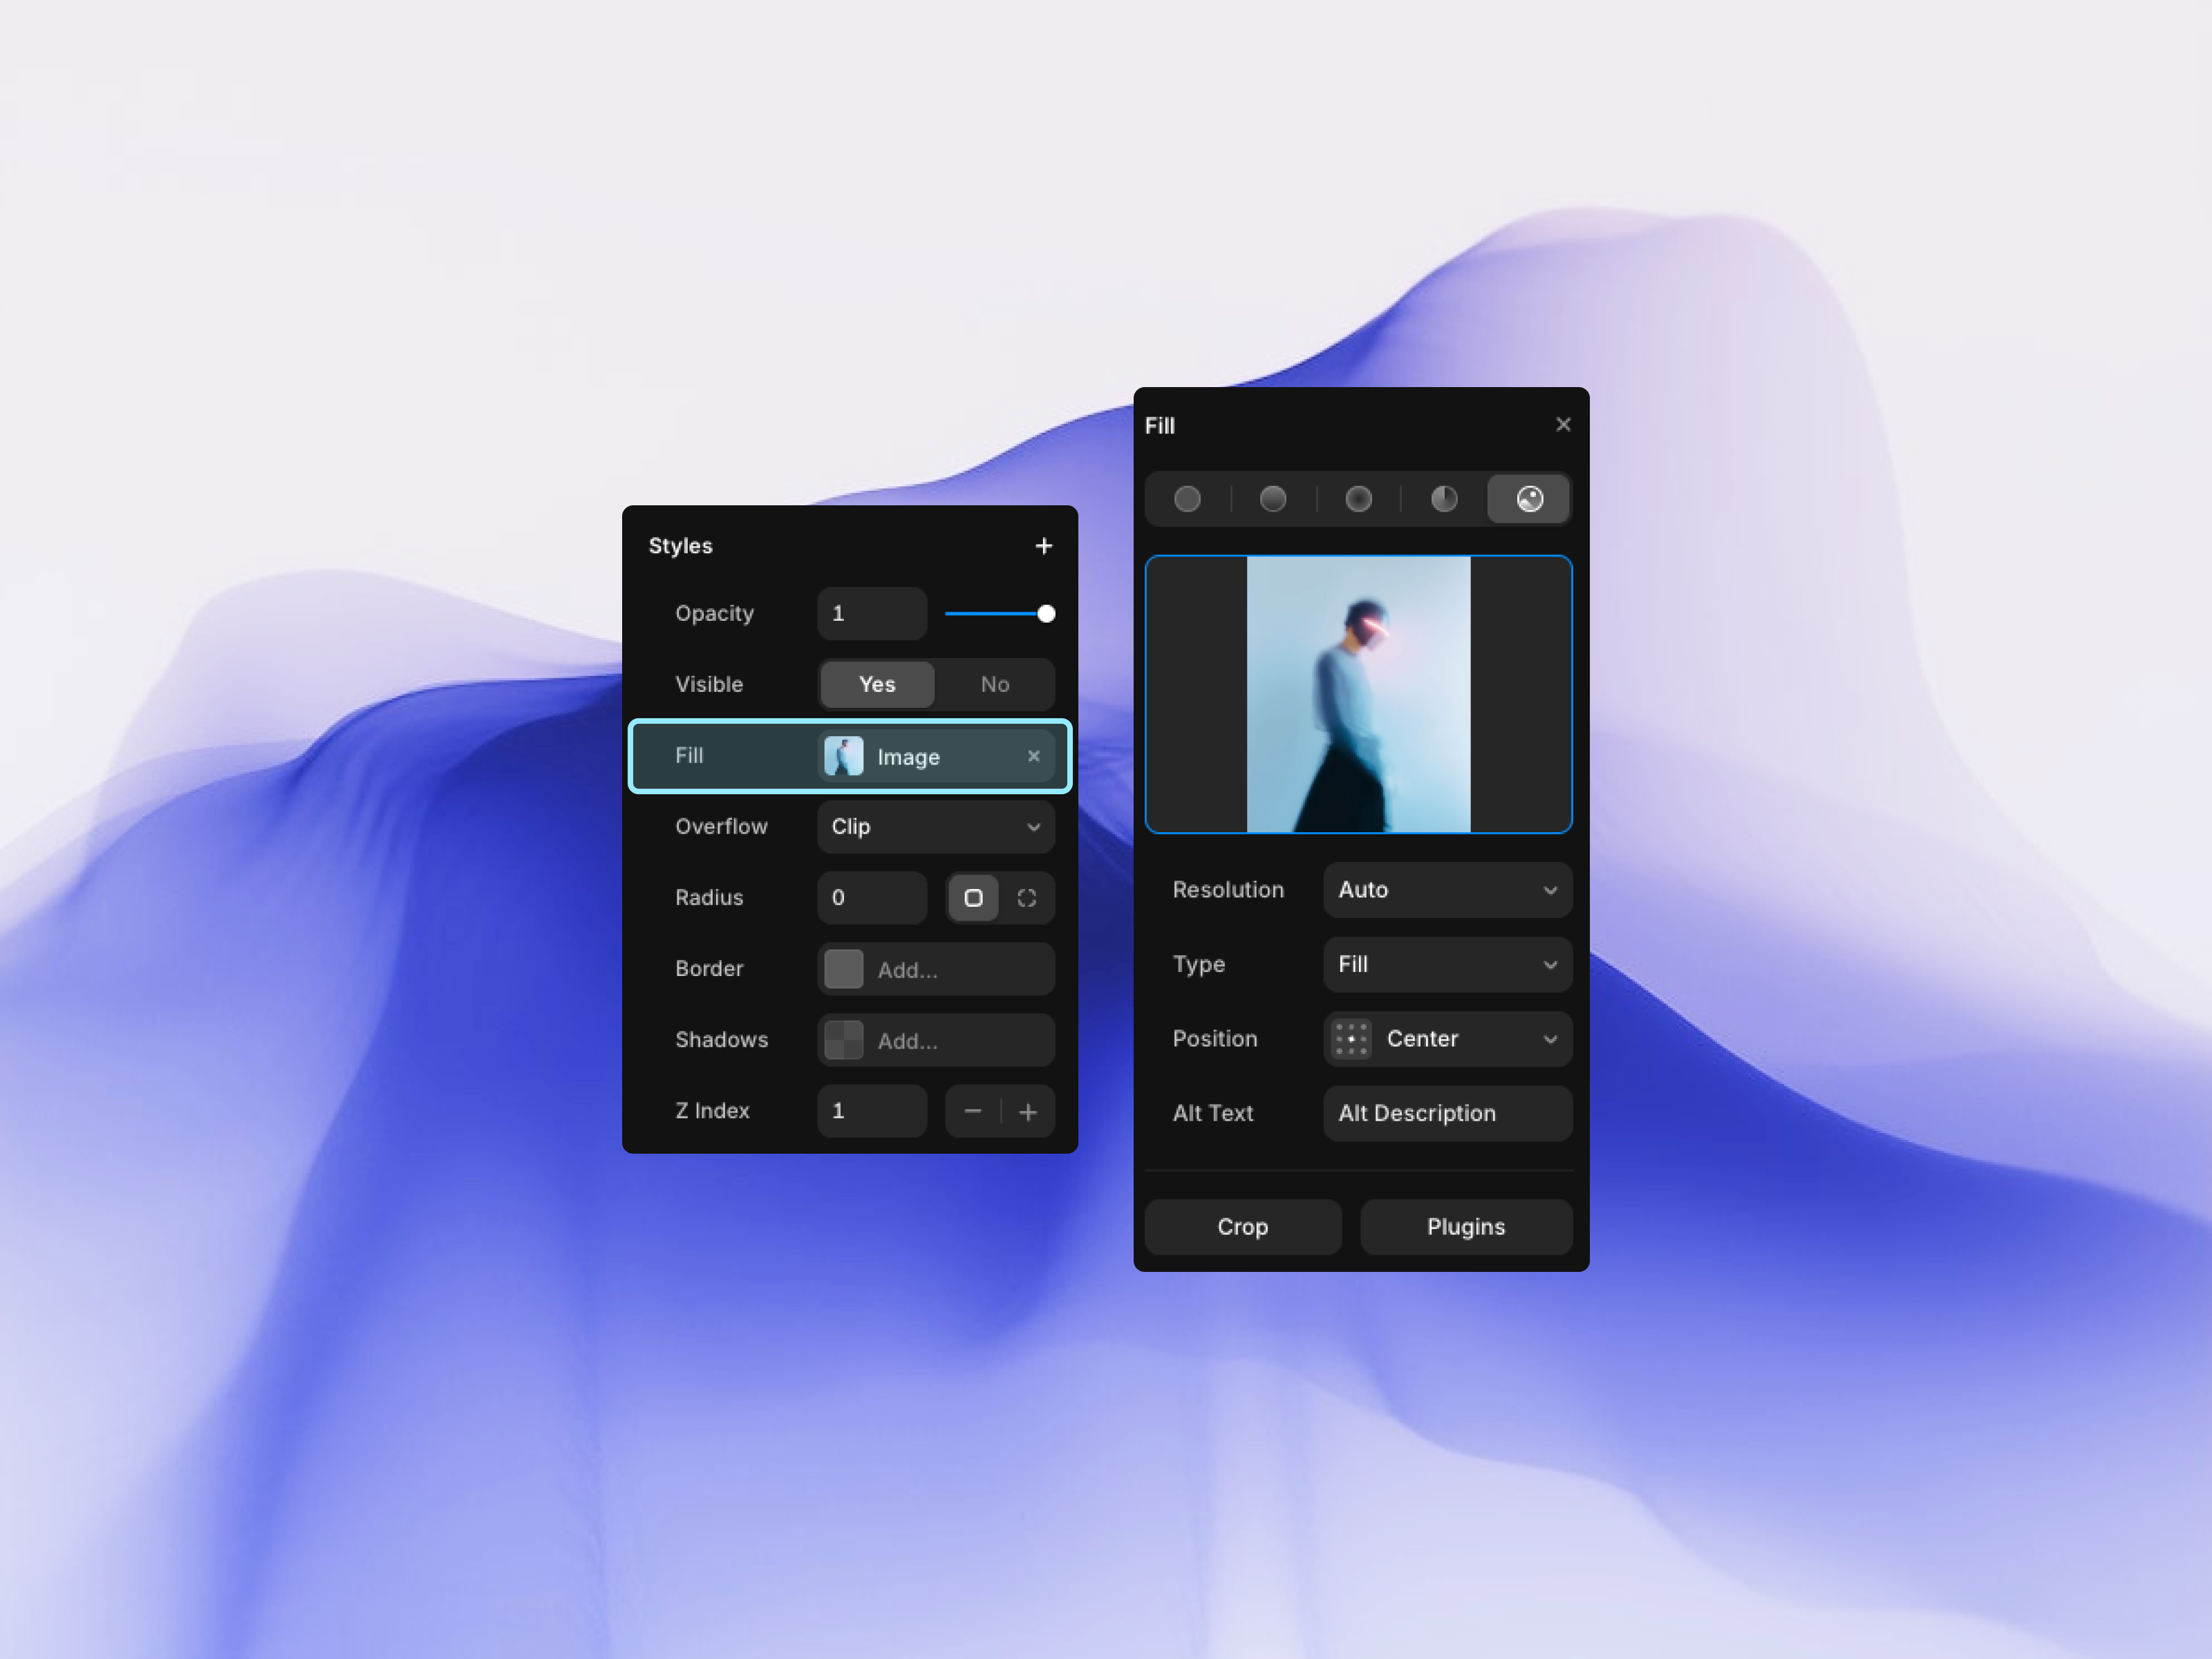
Click that button and you'll get three options: upload from your computer, choose from your Framer assets library, or paste an image URL. Upload is the most common choice—simply select your image file and Framer will place it into the existing image container.
The beauty of this approach is that your image automatically inherits all the properties of the original: corner radius, shadows, filters, and most importantly, its responsive behavior. The layout doesn't break because the container stays exactly the same size and position.
Maintaining Visual Consistency
As you replace content, pay attention to the visual weight and hierarchy of your changes. If the original headline was five words and you replace it with twenty, the design might feel unbalanced. If the original image was light and airy but you upload something dark and heavy, the mood shifts.
This doesn't mean you can't make these changes—just be intentional about them. Step back frequently and preview your page to see if the overall composition still works.
Keeping Spacing Intact
Spacing is what makes designs breathe. The template you're using has carefully considered padding and margins between elements. When you edit text or images, try not to adjust these spacing values unless you have a specific reason.
If a text block becomes longer and pushes other elements down, that's usually fine—the layout is designed to flex. But if you start manually adjusting the position of individual elements to compensate, you risk breaking the responsive design.
Instead, let the layout adapt naturally. If something truly doesn't work, consider editing the content to be more concise rather than fighting the design.
Quick Tip: Before replacing any image, duplicate the page or section. If your replacement doesn't work as expected, you can always reference the original to see what the dimensions and fit settings should be.